
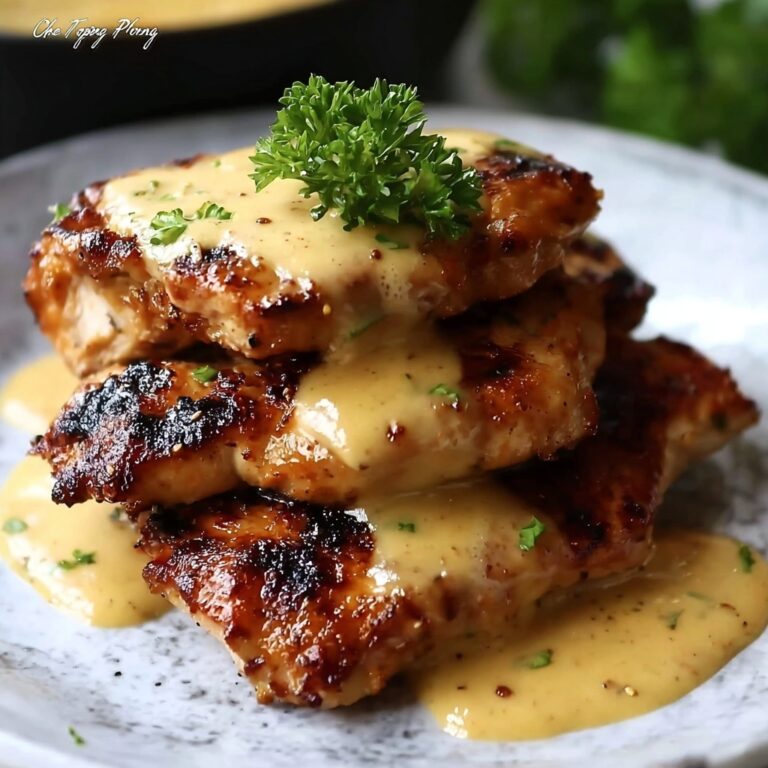
If you’ve been craving that perfect balance of crunch and juiciness without the mess and guilt of deep-frying, this Crispy Oven Fried Chicken Recipe is about to become your new best friend. Tender strips of chicken breast get lovingly coated in a well-seasoned flour and breadcrumb mixture, then baked to golden, crispy perfection in the oven. The secret is using a hot pan, a double dredging method, and a little butter to achieve that irresistible crunch. Whether for a weeknight family dinner or a casual get-together, this recipe delivers all the flavor with less fuss.
Ingredients You’ll Need
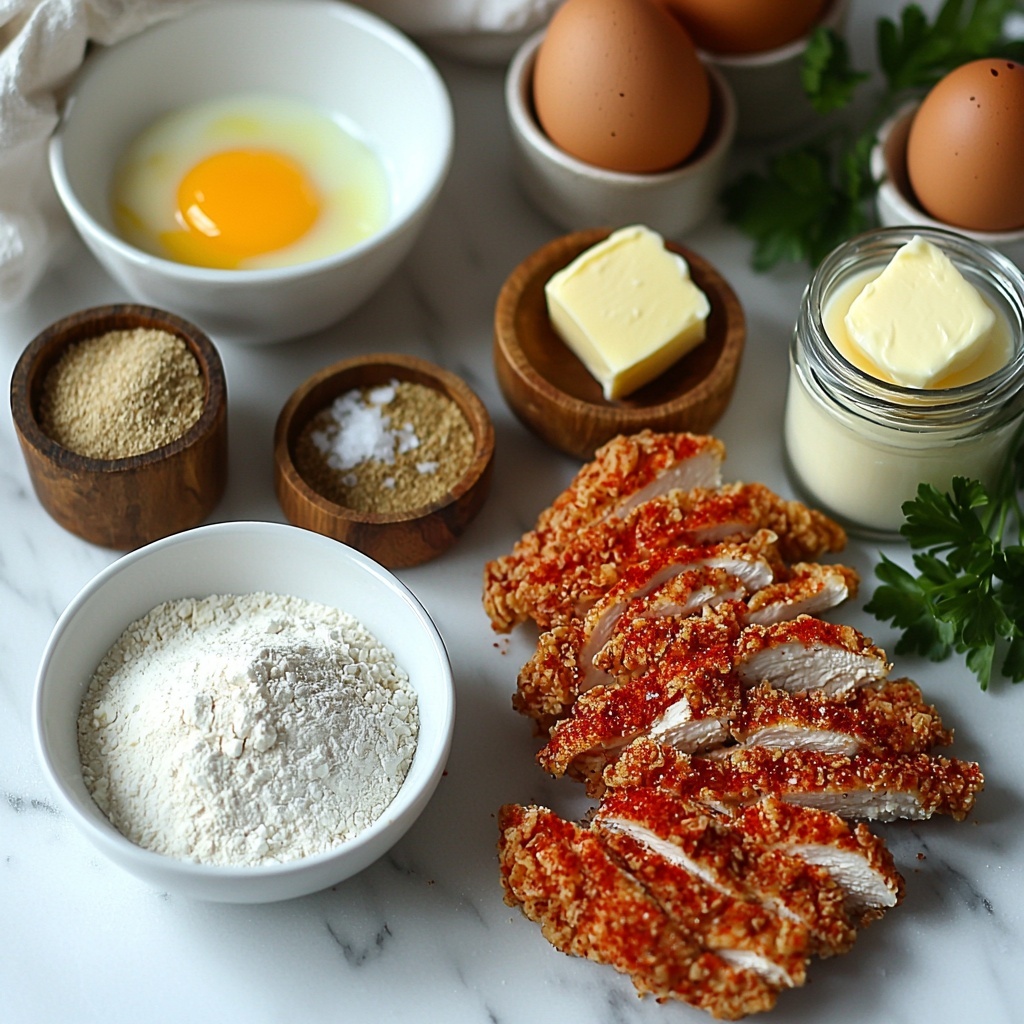
Simple ingredients come together in this recipe, each playing a starring role to create crispy, flavorful chicken without deep-frying. From the tangy buttermilk that tenderizes the chicken, to the combination of spices and breadcrumbs that add crunch and color, these pantry staples make this dish both easy and unforgettable.
- 1 large egg: Acts as a binder that helps the breading stick beautifully to the chicken.
- 1/3 cup buttermilk (or regular milk): Adds moisture and a slight tang that keeps the chicken juicy.
- 1 cup all-purpose flour: The base of the coating that creates a crispy shell.
- 4 tablespoons breadcrumbs (Panko or Italian seasoned): Adds extra crunch and texture to the coating.
- 1 teaspoon baking powder: Lightens the coating for a crispier bite.
- 1.5 teaspoons salt: Essential for bringing out all the flavors—adjust to your taste.
- 2 teaspoons ground paprika: Gives a smoky depth and warm color.
- 1 teaspoon garlic powder: Infuses the chicken with savory undertones.
- 1 teaspoon onion powder: Adds subtle sweetness and aroma.
- 1/2 teaspoon ground pepper: Provides a gentle kick.
- 2 pounds boneless, skinless chicken breast (cut into strips): The star of the dish—cut into manageable strips for even cooking.
- 1/4 cup butter (or more as needed): Melts on the hot pan to help crisp the breading and add richness.
How to Make Crispy Oven Fried Chicken Recipe
Step 1: Prep the Oven and Pan
Start by preheating your oven to 410°F. To achieve that signature crispiness without deep frying, place a dark-colored or cast iron pan in the oven while it’s heating up. This will allow the pan to get wonderfully hot, which is essential for browning those chicken strips to perfection later on.
Step 2: Mix Up Your Breading
While the oven warms, whisk together the egg and buttermilk in a medium bowl—this mixture helps the breading to cling tightly to the chicken. In another bowl, combine the flour, breadcrumbs, baking powder, salt, paprika, garlic powder, onion powder, and pepper. This seasoning blend will create a flavorful crust that’s bursting with taste.
Step 3: Coat the Chicken
Here’s where the magic happens. First, toss your chicken strips in the flour mixture, shaking off the excess for an even base coat. Next, dip them into the egg and buttermilk mixture, and then coat them again generously in the flour mix. Press the breading firmly onto the chicken so it adheres well—this double dredging step ensures maximum crispiness.
Step 4: Prepare the Hot Pan
Carefully remove the hot pan from the oven and melt the butter in it. Immediately place your coated chicken strips on the buttered surface, making sure to leave space between pieces so they cook evenly and don’t steam each other. If your pan can’t hold all the chicken at once, it’s perfectly fine to bake them in two batches.
Step 5: Bake to Crispy Perfection
Bake the chicken at 410°F for 10 to 12 minutes. Then, carefully flip each piece and continue baking for another 5 to 10 minutes, depending on the thickness of the strips. If the pan starts to dry out, add a bit more butter to keep everything sizzling. Finish by broiling the chicken for 1 to 2 minutes to lock in a golden-brown color and that signature crunch you’re craving.
Step 6: Rest and Serve
Once out of the oven, allow the chicken to rest for 2 to 3 minutes. This little pause lets the juices settle inside each juicy bite and prevents the crust from becoming soggy as you serve it hot, right from the pan.
How to Serve Crispy Oven Fried Chicken Recipe
Garnishes
Add a fresh touch with some chopped parsley, a squeeze of lemon juice, or even a sprinkle of grated Parmesan cheese. These simple garnishes bring brightness and enhance the vibrant flavors of the crispy chicken strips.
Side Dishes
This Crispy Oven Fried Chicken Recipe pairs beautifully with classic comfort sides like creamy mashed potatoes, tangy coleslaw, or a crisp garden salad. Roasted vegetables or buttery corn on the cob also make for delicious complements when you want to keep things lighter and colorful.
Creative Ways to Present
For a fun twist, serve the chicken strips in slider buns with your favorite sauces such as honey mustard or spicy aioli for a quick sandwich. You can also toss strips on top of leafy greens or even alongside crispy fries for a casual, crowd-pleasing feast.
Make Ahead and Storage
Storing Leftovers
Place leftover chicken in an airtight container and refrigerate promptly. It will stay fresh and maintain good texture for up to 3 to 4 days, making it easy to enjoy tasty leftovers for lunch or dinner.
Freezing
You can freeze cooked chicken strips in a single layer on a baking sheet to prevent sticking, then transfer to a freezer-safe container or bag. They’ll keep well for up to 1 month. When ready to eat, thaw in the fridge overnight before reheating.
Reheating
To bring back that crispy texture, reheat the chicken in a preheated oven at 350°F for about 10 minutes or until warmed through. Avoid microwaving, which can make the coating soggy, and instead opt for baking or toaster oven methods.
FAQs
Can I use regular milk instead of buttermilk?
Absolutely! Regular milk works just fine if you don’t have buttermilk on hand. For a bit more tang, you can add a teaspoon of lemon juice or vinegar to the milk and let it sit for 5 minutes before using.
Why is the pan heated before adding the chicken?
Heating the pan beforehand ensures the butter sizzles immediately when the chicken strips hit the surface, kickstarting the crisping process and preventing the chicken from sticking.
Can I use skin-on chicken pieces?
While this recipe is designed for boneless, skinless chicken breast strips, you can experiment with skin-on pieces. Just adjust cooking times to ensure the chicken is cooked through and the skin crisps nicely.
What if I don’t have breadcrumbs?
You can substitute breadcrumbs with crushed crackers or cornflakes for a different crunch and flavor. Panko breadcrumbs tend to give the crispiest texture, so they’re the preferred choice when available.
Is it possible to make this recipe gluten-free?
Yes! Swap the all-purpose flour and breadcrumbs for gluten-free versions. Just be sure to use a gluten-free baking powder and seasonings to keep all ingredients safe for gluten sensitivities.
Final Thoughts
Once you make this Crispy Oven Fried Chicken Recipe, I promise it will become a staple in your cooking rotation. The perfect crispy crust wrapped around tender, juicy chicken strips is simply irresistible—and the best part is it’s all done in your oven with minimal fuss and maximum flavor. Go ahead and treat yourself and your loved ones to this delicious comfort food that satisfies those fried chicken cravings without the hassle of frying. You won’t regret it!
Print
Crispy Oven Fried Chicken Recipe
- Prep Time: 10 minutes
- Cook Time: 25 minutes
- Total Time: 35 minutes
- Yield: 6 servings
- Category: Main Course
- Method: Baking
- Cuisine: American
Description
This Crispy Oven Fried Chicken recipe offers a healthier twist on classic fried chicken by baking instead of deep frying. The chicken breasts are coated in a flavorful seasoned breadcrumb and flour mixture, then oven baked to crispy perfection with a deliciously golden crust, making it perfect for a satisfying weeknight meal without the mess of frying.
Ingredients
Wet Ingredients
- 1 large egg
- 1/3 cup buttermilk (OR regular milk; see notes)
- 1/4 cup butter (or more as needed)
Dry Ingredients
- 1 cup all-purpose flour
- 4 tablespoons breadcrumbs (Panko or Italian seasoned work as well)
- 1 teaspoon baking powder
- 1.5 teaspoons salt (adjust to your taste)
- 2 teaspoons ground paprika
- 1 teaspoon garlic powder
- 1 teaspoon onion powder
- 1/2 teaspoon ground pepper
Main Ingredient
- 2 pounds boneless, skinless chicken breast (cut into strips, about 2–3 strips per breast)
Instructions
- Prep: Preheat your oven to 410°F. Place a dark-colored, cast iron, or at least a silver metal pan inside the oven to heat up while you prepare the chicken. This pre-heated pan will help achieve a crispy crust on the chicken.
- Prepare breading: In a medium bowl, whisk together the egg and buttermilk until well combined. In a separate bowl, mix together the all-purpose flour, breadcrumbs, baking powder, salt, paprika, garlic powder, onion powder, and ground pepper thoroughly.
- Bread the chicken: Toss the chicken strips in the flour mixture first, making sure they are coated evenly. Shake off any excess flour. Next, dip the chicken pieces into the egg and buttermilk mixture. Then dip them back into the flour mixture, this time pressing the breading onto the chicken to ensure it sticks well and forms a thick crust.
- Place chicken on pan: Carefully remove the hot pan from the oven. Melt the butter on the pan to coat the surface. Place the breaded chicken strips evenly spaced on the pan, ensuring they do not touch. This allows for even baking and crispiness. Depending on your pan size, you may need to bake the chicken in two batches.
- Oven fry: Bake the chicken strips for 10-12 minutes. Then carefully flip each piece over and bake for another 5-10 minutes, depending on the thickness of your chicken strips. Add more butter to the pan as needed to keep the chicken moist and to help with browning. Finally, broil the chicken for 1-2 minutes until the crust is golden brown and extra crispy. Keep a close eye on them while broiling to avoid burning.
- Serve: Remove the chicken from the oven and let it rest for 2-3 minutes to allow the juices to redistribute. Serve immediately for the best crispy texture and delicious flavor.
Notes
- You can substitute buttermilk with regular milk if you don’t have buttermilk on hand.
- Use a well-seasoned cast iron or dark metal pan to promote crispy browning.
- Do not overcrowd the pan when baking; cook in batches if necessary to allow even air circulation.
- Press the breading firmly onto the chicken to prevent it from falling off during cooking.
- Keep an eye on the chicken while broiling – it only takes 1-2 minutes to crisp up.

