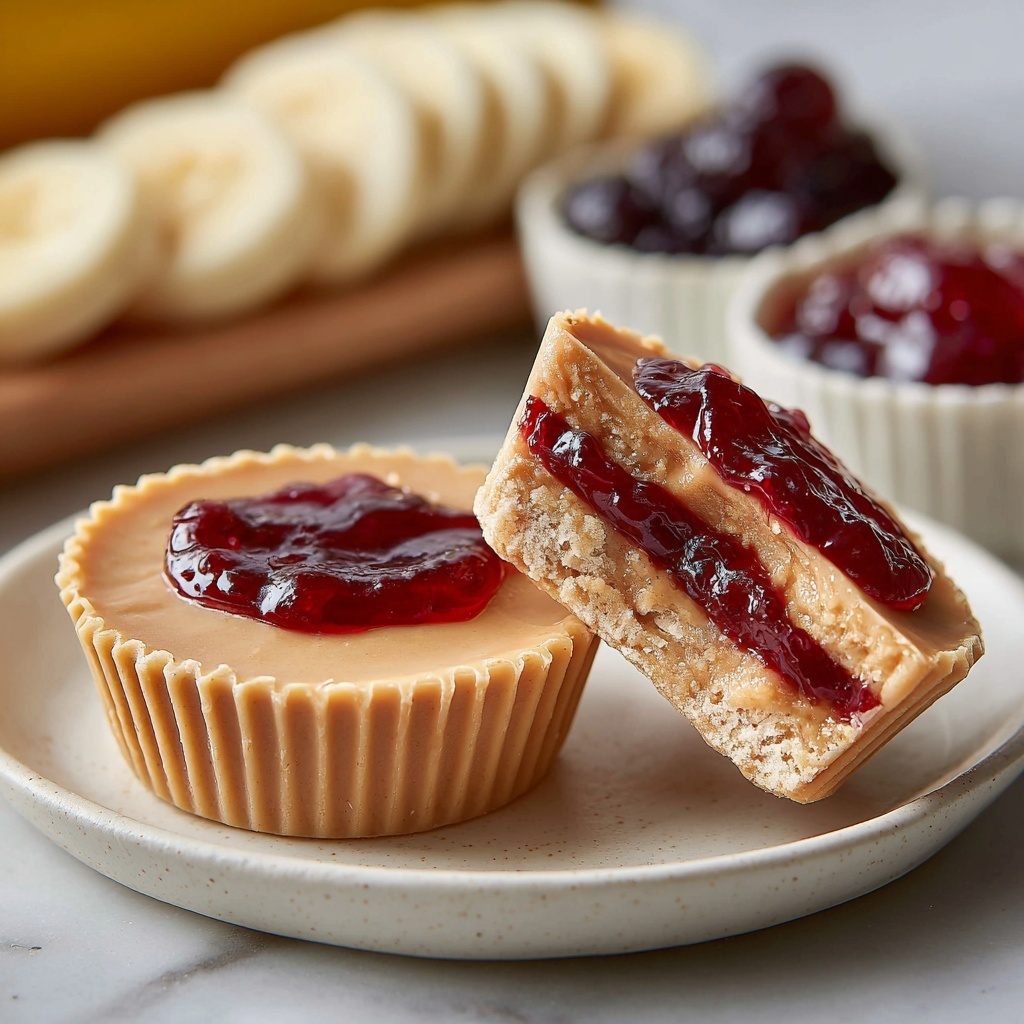
If you love the classic combo of peanut butter and jelly but want to elevate it into a bite-sized treat, this Peanut Butter & Jelly Cups Recipe is calling your name. Imagine creamy peanut butter filling, a luscious layer of your favorite jelly, all encased in a rich chocolate shell that adds a satisfying crunch and a hint of indulgence. It’s the perfect blend of nostalgic flavors with a fun twist that anyone can make at home with just a few simple ingredients!
Ingredients You’ll Need
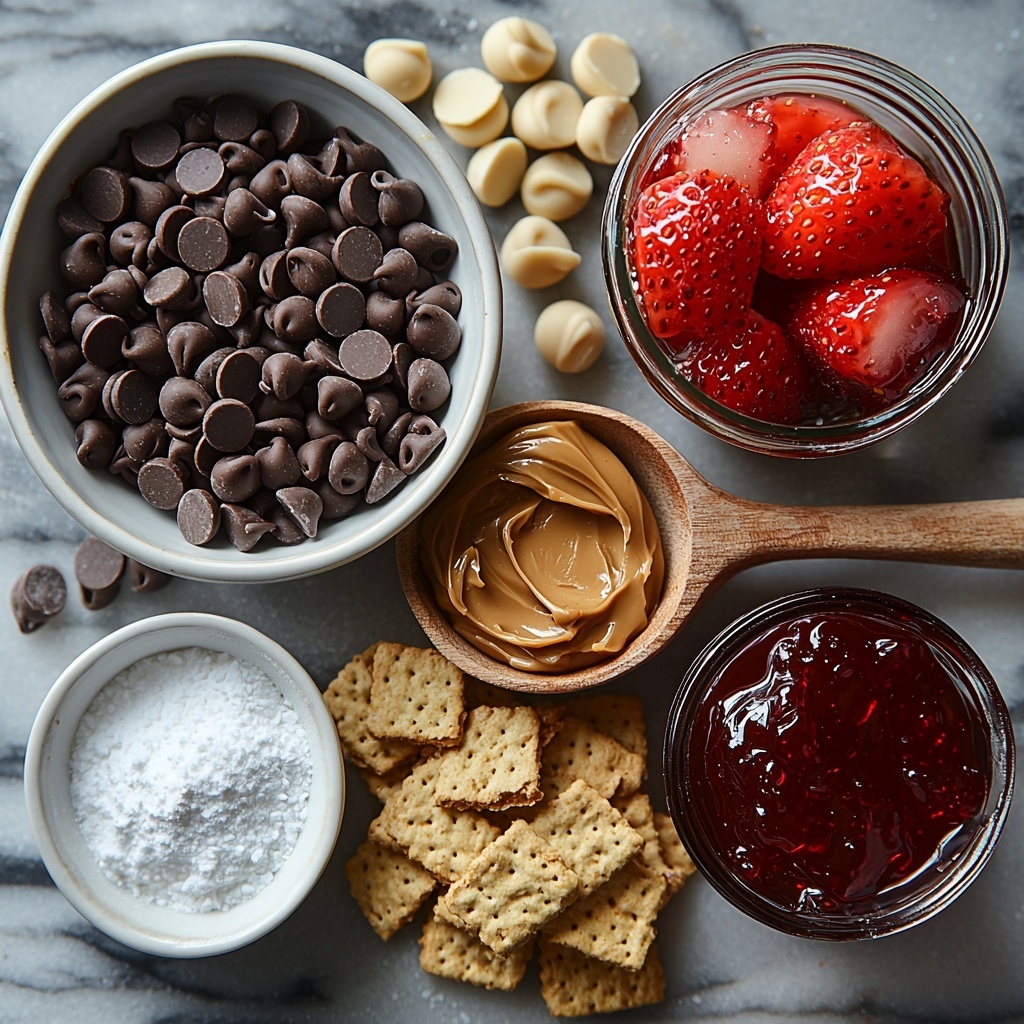
These ingredients are straightforward but essential, each playing a vital role in creating the perfect balance of texture, flavor, and color in your Peanut Butter & Jelly Cups Recipe. From the velvety smoothness of the peanut butter to the fruity brightness of the jelly, every element shines through.
- 1 cup semi-sweet chocolate chips: Opt for dark chocolate if you prefer a richer, slightly less sweet shell.
- 1 tablespoon coconut oil: This is optional but helps achieve a glossy, smoother chocolate shell.
- 1 cup creamy peanut butter: Natural or regular, it brings that creamy, nutty heart to your cups.
- 1/2 cup powdered sugar: Adds just the right amount of sweetness to the peanut butter filling.
- 1/4 cup graham cracker crumbs: Offers a subtle crunch and lovely texture contrasts.
- 1/2 teaspoon vanilla extract: Enhances the flavors with a warm, sweet aroma.
- Pinch of salt: Balances the sweetness and intensifies the overall flavor.
- 1/2 cup jelly or jam: Choose your favorite flavor like strawberry, grape, or raspberry for a fruity pop.
How to Make Peanut Butter & Jelly Cups Recipe
Step 1: Melt the Chocolate
Start by melting your chocolate chips and coconut oil (if using) in a microwave-safe bowl. Heat in 30-second bursts, stirring between each to ensure a silky smooth consistency. This step is crucial because a well-melted chocolate shell will set beautifully and provide that delicate snap when you bite in.
Step 2: Prepare the Muffin Tin
Line each cup of your muffin tin with either paper liners or silicone molds. These liners will make removing the finished cups a breeze, and silicone cups are perfect for an eco-friendly alternative.
Step 3: Add Chocolate to Liners
Spoon enough melted chocolate into the bottom of each liner to cover it completely, then use the back of the spoon to gently spread a bit up the sides. This forms the sturdy chocolate shell that will hold all our delicious layers together.
Step 4: Chill
Pop the muffin tin into the refrigerator for 10 to 15 minutes so the chocolate can firm up nicely. This helps to prevent the layers from mixing later on and keeps everything neat and tidy.
Step 5: Mix Filling Ingredients
While the chocolate chills, combine the creamy peanut butter, powdered sugar, graham cracker crumbs, vanilla extract, and a pinch of salt in a bowl. Stir thoroughly until the mixture is smooth and perfect for spooning into your cups — this filling is utterly irresistible.
Step 6: Add Peanut Butter Filling
Take the muffin tin out of the fridge and spoon the peanut butter filling into each chocolate-lined cup until it’s about three-quarters full. It’s important not to overfill here, so you have room for the jelly layer and the final chocolate topping.
Step 7: Add Jelly Layer
Carefully spoon a small amount of your favorite jelly or jam on top of each peanut butter filling. Make a slight well in the center so the jelly nestles perfectly in each cup, adding a burst of fruity sweetness that pairs so beautifully with the nutty filling.
Step 8: Top with Chocolate
Pour the remaining melted chocolate over the jelly layer, making sure to cover it completely. Give the muffin tin a gentle tap on the counter to settle the chocolate layers evenly. This final chocolate coat seals everything inside and creates that gorgeous glossy finish.
Step 9: Chill Again
Return the muffin tin to the refrigerator and chill for another 15 to 20 minutes. This step ensures the cups set firmly and are easy to remove in perfect, intact shapes.
Step 10: Remove from Tin
Once fully set, carefully peel off the liners or pop the silicone cups open to reveal gorgeous little Peanut Butter & Jelly Cups ready to wow everyone with their flavor and texture.
Step 11: Enjoy
Serve your Peanut Butter & Jelly Cups right away for the best freshness, or store them in an airtight container in the fridge for up to a week—though they rarely last that long!
How to Serve Peanut Butter & Jelly Cups Recipe
Garnishes
Sprinkle a few crushed peanuts or a tiny drizzle of extra jelly on top for added flair and crunch. A light dusting of powdered sugar or a couple of fresh berries alongside can also make the presentation even more inviting.
Side Dishes
These cups pair wonderfully with a cold glass of milk or a scoop of vanilla ice cream for a dessert experience that feels both nostalgic and indulgently fresh. For gatherings, serve alongside fresh fruit or light cookies to round out the snack options.
Creative Ways to Present
Try arranging your Peanut Butter & Jelly Cups Recipe on a decorative platter with colorful napkins or use mini cupcake stands to showcase them elegantly. For parties, wrap them individually in clear cellophane tied with a ribbon—these treats make fantastic party favors or thoughtful gifts!
Make Ahead and Storage
Storing Leftovers
Keep leftover Peanut Butter & Jelly Cups in an airtight container in the refrigerator for up to one week. This keeps the chocolate firm and preserves the freshness of the peanut butter and jelly layers.
Freezing
You can freeze these cups by placing them in a single layer on a baking sheet until firm, then transferring them to an airtight container or freezer bag. They’ll keep well for up to 2 months. Just thaw in the fridge when you’re ready for a sweet treat!
Reheating
Because these are no-bake treats with a delicate chocolate shell, reheating isn’t recommended. Instead, let them sit at room temperature for 10-15 minutes before enjoying if you prefer a softer texture.
FAQs
Can I use crunchy peanut butter instead of creamy?
Absolutely! Crunchy peanut butter will add a delightful extra texture to the filling, which can be a nice twist if you love a little crunch alongside the smooth chocolate and jelly.
What kind of jelly or jam works best?
Any flavor you love will work, but classic choices like strawberry, grape, or raspberry shine brightest. Feel free to experiment with exotic jams like mango or blueberry for a unique spin.
Is the coconut oil necessary for melting the chocolate?
Not necessarily, but adding coconut oil helps create a smoother, shinier chocolate shell and makes it easier to spread. If you skip it, just be sure to melt the chocolate carefully to avoid burning.
Can I make these cups vegan or allergy-friendly?
Definitely! Use dairy-free chocolate chips and a plant-based peanut butter. For nut allergies, try sunflower seed butter instead of peanut butter. Just adjust the powdered sugar and other ingredients to taste.
How long will these cups last at room temperature?
Because of the perishable peanut butter filling and jelly, it’s best to store these cups in the refrigerator. At room temperature, they should only be left out for a few hours to avoid spoilage.
Final Thoughts
This Peanut Butter & Jelly Cups Recipe is a cozy, charming treat that brings the familiar flavors of a childhood favorite into a fun, elegant form. Whether you’re making them for yourself, your family, or a special occasion, they’re easy to whip up and impossible to resist. Give this recipe a try—you’ll quickly see why it’s become one of those love-it-forever desserts!
Print
Peanut Butter & Jelly Cups Recipe
- Prep Time: 15 minutes
- Cook Time: 0 minutes
- Total Time: 45 minutes
- Yield: 12 cups
- Category: Dessert
- Method: No-Cook
- Cuisine: American
Description
Delicious no-bake Peanut Butter & Jelly Cups featuring a smooth chocolate shell, creamy peanut butter filling, and a sweet jelly layer. These easy-to-make treats combine classic flavors into bite-sized indulgences perfect for snacks or desserts.
Ingredients
Chocolate Shell
- 1 cup semi-sweet chocolate chips (or dark chocolate chips)
- 1 tablespoon coconut oil (optional, for smoother consistency)
Peanut Butter Filling
- 1 cup creamy peanut butter (natural or regular)
- 1/2 cup powdered sugar
- 1/4 cup graham cracker crumbs
- 1/2 teaspoon vanilla extract
- Pinch of salt
Jelly Layer
- 1/2 cup jelly or jam (strawberry, grape, raspberry, or preferred flavor)
Instructions
- Melt the Chocolate: In a microwave-safe bowl, combine the chocolate chips and coconut oil. Microwave in 30-second intervals, stirring between each, until the chocolate is fully melted and smooth.
- Prepare the Muffin Tin: Line a muffin tin with paper liners or silicone cupcake cups to prevent sticking.
- Add Chocolate to Liners: Spoon a small amount of melted chocolate into the bottom of each liner, spreading some up the sides for a shell effect.
- Chill the Shell: Refrigerate the muffin tin for 10-15 minutes to let the chocolate set and harden.
- Mix Filling Ingredients: In a medium bowl, combine the peanut butter, powdered sugar, graham cracker crumbs, vanilla extract, and salt. Stir until the mixture is smooth and well combined.
- Add Peanut Butter Filling: Remove the muffin tin from the refrigerator and spoon the peanut butter filling into each chocolate shell, filling about 3/4 full.
- Add Jelly Layer: Top each peanut butter-filled cup with a small spoonful of your chosen jelly or jam, creating a small well in the center.
- Top with Chocolate: Pour the remaining melted chocolate over the jelly layer, fully covering it. Gently tap the muffin tin on the counter to settle the chocolate evenly.
- Chill Again: Place the muffin tin back into the refrigerator and chill for an additional 15-20 minutes until the chocolate sets completely.
- Remove from Tin: Once set, carefully remove the cups from the muffin tin and peel off the paper liners.
- Serve or Store: Enjoy immediately or store in an airtight container in the refrigerator for up to one week.
Notes
- Use natural peanut butter for a healthier option, but regular creamy peanut butter works well too.
- Substitute coconut oil in the chocolate for a richer texture and easier melting.
- Any flavor of jelly or jam can be used based on your preference.
- Make sure not to overfill the peanut butter layer to prevent overflow when adding jelly and chocolate.
- Store these cups in the refrigerator to keep the chocolate firm and fresh.

