
If you’re looking for the perfect sweet treat to express your heartfelt feelings, this Valentine’s Day Heart Cookies with Royal Icing Recipe is absolutely a must-try. These charming, buttery heart-shaped cookies are delightfully tender with just the right balance of sweetness, topped with beautifully smooth royal icing that you can color and decorate any way you like. Whether you’re surprising a loved one or hosting a festive party, this recipe delivers both in taste and presentation, making your Valentine’s Day extra special and deliciously memorable.
Ingredients You’ll Need
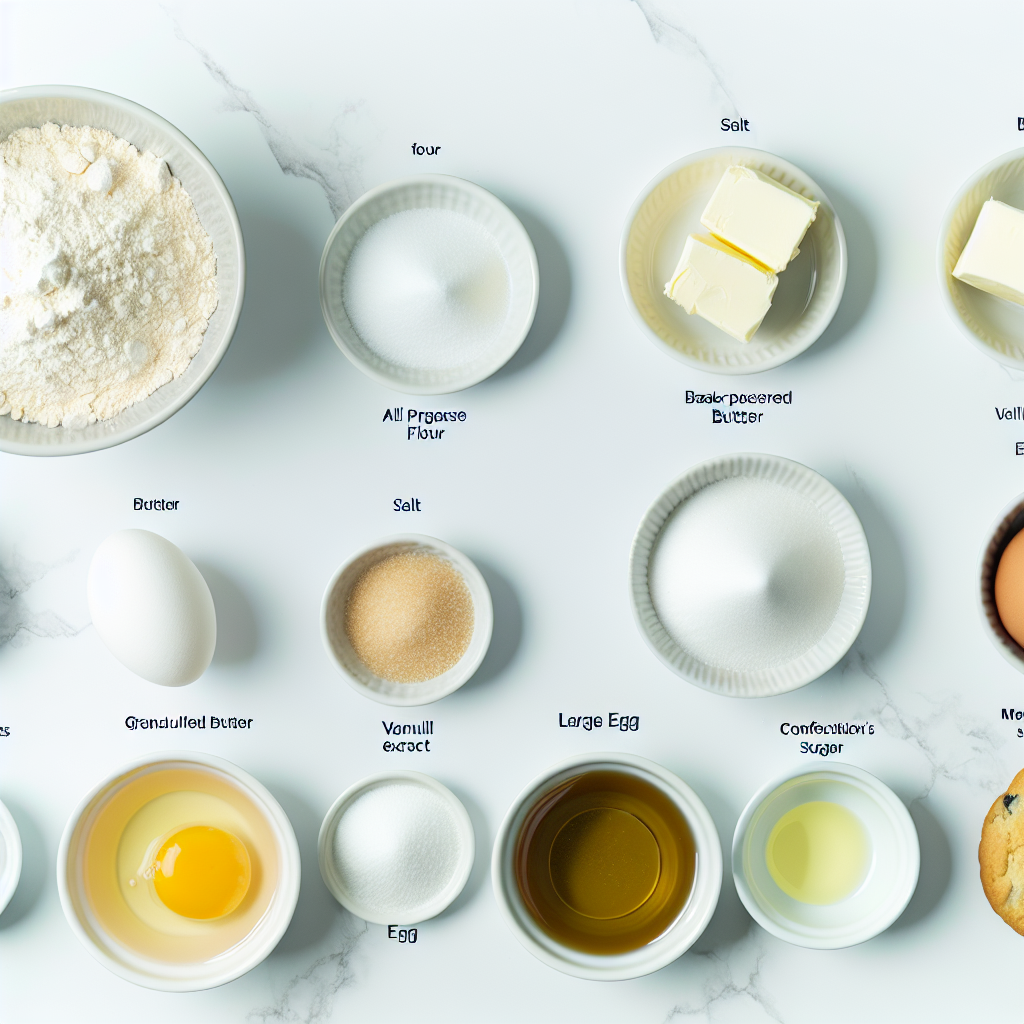
This recipe uses simple, staple ingredients that come together to create irresistibly soft cookies with a perfect finish. Each component has a role, from the flour that builds structure to the buttery softness that melts in your mouth, not to mention the royal icing that adds vibrant color and a touch of elegance.
- All-purpose flour (2 and 1/4 cups): Provides the sturdy base for these cookies, ensuring they hold their lovely heart shape through baking and decorating.
- Baking powder (1/2 teaspoon): Adds just a hint of lift for tender, light texture.
- Salt (1/4 teaspoon): Enhances the flavors and balances the sweetness beautifully.
- Unsalted butter (3/4 cup, softened): Essential for that rich, melt-in-your-mouth sensation and creamy dough consistency.
- Granulated sugar (3/4 cup): Sweetens the dough evenly without overpowering the buttery richness.
- Large egg (1): Binds the ingredients and lends moisture for perfect dough consistency.
- Pure vanilla extract (2 teaspoons): Infuses a warm, aromatic depth to every bite.
- Almond extract (1/4 to 1/2 teaspoon, optional): Adds a subtle, delightful twist that truly elevates the flavor.
- Confectioners’ sugar (4 cups, sifted): Forms the silky smooth base of the royal icing for flawless decoration.
- Meringue powder (3 tablespoons): Helps the royal icing set to a perfect, glossy finish that hardens just right.
- Room-temperature water (9–10 tablespoons): Adjusts the icing to the ideal piping consistency.
- Gel food coloring: Provides vibrant hues to create eye-catching designs without watering down the icing.
How to Make Valentine’s Day Heart Cookies with Royal Icing Recipe
Step 1: Combine the Dry Ingredients
Start by whisking together your flour, baking powder, and salt in a medium bowl. This ensures that the leavening and seasoning are evenly distributed through the dough, creating a uniform texture and subtle balance of flavors in every bite.
Step 2: Cream Butter and Sugar
Using a stand mixer or handheld mixer, beat the softened butter with the granulated sugar on high speed until it turns smooth, creamy, and pale – this usually takes about three minutes. This step is key for fluffy, tender cookies with just the right crumb. Then, add the egg, vanilla, and optional almond extract. Beat until everything is well incorporated, ensuring your dough will have a rich, aromatic base.
Step 3: Incorporate Dry Ingredients into Wet
Add your dry flour mixture to the wet ingredients and mix on low speed until just combined. The dough will feel a little soft but manageable. If it’s too sticky to roll out, add a tablespoon more flour gradually to get the perfect texture for shaping without losing softness.
Step 4: Roll Out the Dough
Divide the dough into two parts, and roll each out between lightly floured parchment papers or silicone mats to about 1/4-inch thickness. This thickness allows the cookies to bake evenly, with just enough substance to hold beautiful icing decorations.
Step 5: Chill the Dough
Stack the two rolled-out dough sheets with a dusting of flour and parchment between to prevent sticking. Cover tightly and refrigerate for at least two hours, or up to two days. Chilling firms the dough, making those perfect heart shapes easier to cut and helping the cookies maintain their form while baking.
Step 6: Cut and Bake Your Hearts
Once chilled, preheat your oven to 350°F (177°C). Using a heart-shaped cookie cutter, cut out your cookies, gathering and re-rolling scraps as you go. Place the hearts spaced about three inches apart on lined baking sheets. Bake for 11 to 12 minutes, or until the edges begin to gently brown, which adds a hint of caramelized flavor and a soft crunch.
Step 7: Prepare the Royal Icing
While your cookies cool, mix the confectioners’ sugar, meringue powder, and water to form the magical royal icing. Beat until it flows smoothly off the whisk but still sets beautifully—a consistency perfect for detailed piping and smooth flooding on the cookies.
Step 8: Color and Pipe the Icing
Divide your icing into separate bowls and tint each with a small drop of gel color to create lovely pastel shades plus a vibrant red for writing. Fill piping bags with your colors and decorate the cooled cookies by outlining and flooding the shapes. Let them set uncovered for a few hours before adding messages or details with the red icing for that extra special touch.
How to Serve Valentine’s Day Heart Cookies with Royal Icing Recipe
Garnishes
To really wow your guests, add a sprinkle of edible glitter or tiny pearl sugar accents to some of the cookies after icing while still wet. Fresh rose petals on the serving plate or a dusting of powdered sugar adds a romantic, elegant vibe that perfectly complements the festive heart shapes and colorful decorations.
Side Dishes
These cookies shine alongside a warm cup of chai, hot cocoa, or even a sparkling rosé for grown-up gatherings. For a cozy touch, serve them with a small plate of fresh fruit slices or a mild cream cheese spread for dipping—light companions that won’t overshadow the rich flavors of your heart cookies.
Creative Ways to Present
Try arranging your cookies in a giant heart shape on a decorative platter for an unforgettable centerpiece, or pile them in a charming gift box wrapped with a red or pink ribbon. You could also string them on a festive garland using small holes and edible thread for a double dose of celebration and sweetness.
Make Ahead and Storage
Storing Leftovers
Your Valentine’s Day heart cookies with royal icing will stay fresh and soft when stored airtight at room temperature, ideally in a single layer separated by parchment paper, for up to five days. Refrigeration can extend their life up to ten days but may slightly harden the icing if not sealed well.
Freezing
Want to prepare ahead? Freeze undecorated cookies in a single layer on a baking sheet, then transfer to a freezer-safe container once firm. They keep well for up to three months and thaw quickly at room temperature—decorate after thawing for best results.
Reheating
Because these cookies are best enjoyed soft and fresh, reheating isn’t necessary. However, if you desire a warm cookie, gently microwave an individual cookie for about 5 to 7 seconds to bring back that fresh-baked softness without melting the icing.
FAQs
Can I make these cookies gluten-free?
Absolutely! Substitute the all-purpose flour for a gluten-free blend designed for baking. You may need to adjust the flour quantity slightly to get the right dough texture, but the cookies will still turn out wonderfully tasty and crisp.
Is almond extract necessary?
Not at all, almond extract is optional but highly recommended. It adds a subtle, fragrant nuance that makes these cookies taste extra special. If you skip it, your cookies will still be delightful and buttery.
How do I prevent my royal icing from cracking?
Crack-free icing happens when you balance the right consistency and drying time. Avoid adding too much water, and allow the iced cookies to dry slowly at room temperature without drafts. Also, covering your icing bowl with a damp towel when not using prevents it from drying out too fast.
Can these cookies be made ahead for a party?
Yes! You can bake and decorate these cookies up to two days in advance. Store them airtight to keep them fresh, or prepare the dough and chill it up to two days before baking if you want the freshest cookies for serving.
What is the best way to decorate if I’m new to royal icing?
Start by outlining the cookie edges with a slightly thicker icing, then flood the center with a thinner consistency. Use toothpicks to spread icing evenly or to fix minor mistakes. There are plenty of tutorials online, and with a little practice, you’ll be decorating like a pro in no time!
Final Thoughts
Making these Valentine’s Day Heart Cookies with Royal Icing Recipe truly feels like sharing something special made with love. From the buttery softness of the cookie to the vibrant, glossy icing decorations, every bite invites warm smiles and joyful moments. So grab your rolling pin, your favorite cookie cutter, and dive into this fun project that brings a little extra sweetness to your Valentine’s Day celebrations. I promise, once you try these, they’ll be a new favorite to bake and share year after year!
Print
Valentine’s Day Heart Cookies with Royal Icing Recipe
- Prep Time: 2 hours
- Cook Time: 12 minutes
- Total Time: 2 hours 12 minutes
- Yield: 20 cookies (3.5-inch each)
- Category: Dessert
- Method: Baking
- Cuisine: American
- Diet: Vegetarian
Description
These Valentine’s Day Cookies are delightful 3.5-inch heart-shaped sugar cookies with a soft, tender texture and smooth royal icing decoration. Perfectly balanced with vanilla and optional almond extract, these cookies are rolled, chilled, baked until lightly golden, and beautifully decorated with pastel royal icing, making them a charming treat for celebrating love and special occasions.
Ingredients
Dry Ingredients
- 2 and 1/4 cups (281g) all-purpose flour (spooned & leveled), plus more as needed for rolling and work surface
- 1/2 teaspoon baking powder
- 1/4 teaspoon salt
Wet Ingredients for Cookies
- 3/4 cup (12 Tbsp; 170g) unsalted butter, softened to room temperature
- 3/4 cup (150g) granulated sugar
- 1 large egg, at room temperature
- 2 teaspoons pure vanilla extract
- 1/4 or 1/2 teaspoon almond extract (optional, but makes the flavor outstanding)
Royal Icing Ingredients
- 4 cups (480g) confectioners’ sugar, sifted
- 3 Tablespoons meringue powder (not plain egg white powder)
- 9–10 Tablespoons room-temperature water
- Gel food coloring kit or any gel food coloring for tinting
Instructions
- Mix Dry Ingredients: Whisk together the all-purpose flour, baking powder, and salt in a medium bowl. Set this mixture aside for later use.
- Cream Butter and Sugar: In a large bowl, use a handheld or stand mixer fitted with a paddle attachment to beat the softened butter and granulated sugar on high speed for about 3 minutes until completely smooth and creamy. Add the egg, vanilla extract, and almond extract if using, then beat on high speed for another minute, scraping down the sides and bottom to ensure even mixing.
- Combine Wet and Dry Ingredients: Add the dry flour mixture to the wet ingredients and mix on low speed until just combined. The dough will be soft; if too sticky for rolling, incorporate 1 more tablespoon of flour carefully.
- Roll Out Dough: Divide the dough into two equal portions. Place each portion on lightly floured parchment paper or silicone baking mats. Using a lightly floured rolling pin, roll each dough portion to an even 1/4-inch thickness, adding flour as needed to prevent sticking.
- Layer and Chill: Lightly dust one rolled dough with flour, then cover with a piece of parchment paper. Place the second rolled dough on top, then cover with plastic wrap or aluminum foil. Refrigerate for at least 2 hours, or up to 2 days, to firm up the dough for easier cutting.
- Cut Cookies: Preheat the oven to 350°F (177°C). Line 2–3 baking sheets with silicone mats or parchment paper. Remove chilled dough layers carefully and cut hearts using a 3.5-inch heart cookie cutter. Re-roll scraps to maximize cookie yield and repeat.
- Bake Cookies: Arrange cookies on baking sheets spaced 3 inches apart. Bake for 11–12 minutes until edges are lightly browned. Rotate trays halfway if necessary. Let cookies cool on the sheets for 5 minutes, then transfer to wire racks to cool completely.
- Prepare Royal Icing: Combine sifted confectioners’ sugar, meringue powder, and 9 tablespoons of room-temperature water in a large bowl. Beat with a hand or stand mixer on high speed for 1.5–2 minutes until icing drizzles smoothly and levels within 5–10 seconds. Adjust consistency with water or more sugar as needed. Yields about 3 cups of icing.
- Color the Icing: Divide icing into 6 bowls, adding a tiny drop of gel food coloring to each of five bowls (pink, violet, green, yellow, orange) and 2–3 drops of red to the sixth bowl for writing. Cover the red icing surface with a damp paper towel to prevent hardening until use.
- Decorate Base Layer: Fill piping bags fitted with round piping tip #4 with the pastel icings. Pipe borders around cookie edges and fill in with icing. Allow to set uncovered for at least 2 hours before applying writing.
- Pipe Messages: Fill a piping bag with red icing fitted with tip #2. Write desired messages or designs on the set cookies. The writing will set within 2–3 hours.
- Storage: Store decorated or plain cookies in an airtight container covered at room temperature for up to 5 days or refrigerate for up to 10 days to maintain freshness.
Notes
- Use almond extract sparingly as it significantly enhances flavor but can overpower if too much is used.
- If dough is too sticky after initial mixing, add flour gradually to avoid tough cookies.
- Royal icing thickens the longer you beat it; add more water if it becomes too stiff prematurely.
- Keeping the red icing covered with a damp towel prevents it from hardening before use.
- Make sure cookies are completely cool before decorating to prevent icing from melting.
- Store cookies in a cool, dry place to keep the icing from becoming sticky or running.


